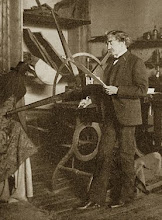
This blog is a record of my adventures as a copper plate etcher and printmaker. I'm a self-taught amateur learning from the ground up.
______________________________________________
"I will again define etching as an impression set down on a copper plate from nature or life -- not a built up, elaborated composition."
Joseph Pennell


Tuesday, December 14, 2010

Landscapes Like Luncheon Trays

My hiatus from printing and printmaking seems to be at end and I’ve recently entered an intaglio exchange in order to insure that I have a specific goal in mind to bring me fully back into the swing of things. I work full-time and, being single, must take care of the many household and other tasks myself. I found the need to focus my limited spare time on my health, specifically with regard to physical exercise. Not being interested in sports, I turned to bicycle riding knowing that this would eventually tie in with printmaking as I could ride where I could not walk or drive to get subjects for the copper plate. I now have a restored bicycle and have started regular riding. At this time of the year my riding has been greatly curtailed but the way has been paved and the journey begun so now it’s back to the acid bath and the press.

I did manage to keep up my personal studies during this time, reading that I’ve found not only interesting in general but helpful in understanding the art that I’m attempting. This is especially true in the case of Whistler who I perhaps idealize more than I should but who, along with his contemporaries, is nonetheless a constant inspiration. Some of my most interesting reads have been Whistler’s letters. He is humorous, nonchalant, and deadly serious about his work all at the same time. He also has definite opinions on everything, especially etching. As an acknowledged master in several genres, that’s hardly surprising.

One of my favorite letters was that to Marcus Bourne Huish, an art dealer and member of the Fine Arts Society in London, concerning accusations that while in Venice in 1879/80 to carry out a paid commission from the Society he was instead rumored to have purchased large plates for work intended for others.

Below is part of his long but entertaining letter to reassure those concerned through his correspondent. Note how he refers to himself in the third person, an affectation not uncommon at that time in certain quarters. Whistler’s unofficial agent was Charles Augustus Howell who had heard the rumors about Whistler’s “large plates” and through concerned inquiries had thus spread them around. Huish heard the rumors and wrote to Whistler about them and this letter was Whistler’s response.

My dear Mr Huish -

I am shocked out of all my usual impassiveness by the suggestion I have this instant read with horror in your letter, that I could be neglecting the work, for which I had exiled myself, in order to trifle with plates, whose exaggerated size, not only partook of the character so generally accorded to all Howellian assertion, but would have been proof enough in itself - were any needed - of the unlikelihood of the story!

Little Mr Brown could have told you how Mr Whistler holds in contempt & derision the "big plate" - the advertisement of the ignorant - the inevitable pitfall of the amateur -

I am even astonished that Howell himself - in his desire to make statements - should have missed this tip - as he has often heard me scoff at the vulgarity of the pretence - and point out the gross condition of brain that could tolerate the offensive disproportion between the delicate needle of the etcher and the monster plate to be covered! - Perceive how inartistic is the undertaking - based as it is on the dulness which distinguishes not between mastery of manner, and "muchness" of matter! - From this pente ridicule the painter's science saves him - he knows that the dimensions of work must be always in relation to the means used - and reaching the limit, unerringly lays aside the needle for the brush, that he may not find himself worming his weary way across a waste of copper - all quality lost - all joy of execution gone - nothing remaining but the doleful task for the dreary industry of the foolish - the virtue of the duffer!. - Behold now the hardy though unconscious Amateur! - He hesitates not! - and so we have heads the size of soup plates - and landscapes like luncheon trays - while lines are bitten furiously until in the impression they stand out like the knotted veins on his own unthinking brow –

Poor meek Rembrant! - with his mild miniatures - beside such colossal deeds how dwarfed he becomes! how uninteresting his puny portraits of diminutive BurgomasterSiegmund Clement de Young - how weak his little windmill - - - - - - Ah well! nous avons changé tout celà (we have changed all that).

Without taking sides, I can at least say that as usual, there’s nothing new under the sun and things seem to have come full circle once again. I admit to being astonished at the size of some of the plates I’ve seen though in those cases the use of the needle seems to have bee replaced almost entirely for wider tools that sometimes seem to amount to spatulas. Needling the plate hardly seems a proper description. I offer no criticism one-way or the other. I’m a mere amateur myself and not a particularly skilled one.

But I do find it interesting from an historical, technical, and stylistic perspective. Some styles change and some remain but there does seem to be a constant, common thread that weaves its way through all of them. In one way or another I think we each develop our own personal method of expression, for better or worse. Studying these subjects has helped me focus better on what I’m trying to achieve. Hopefully it will have the same affect on you.

Friday, July 2, 2010

Etching Of The Week


What, you ask? How can this be the etching of the week when it's Friday? Because the week's not over until tomorrow I answer, thereby leaving you astounded at my logic. Hmmm. In any case, it's better late than never.

The etching above is another I really like and was etched and printed by Otto Henry Bacher (1856-1909). It is a view of the Royal Garden at Schleisheim. Bacher was an American artist from Cleveland, Ohio who had studied in Germany and done some etchings. He happened to be in Venice in 1879 at the time James McN. Whistler was there. Whistler was supposed to be working on twelve plates for the Fine Art Society back in England but while working on these also produced many pastels and oils. It was in Venice that the two were introduced and became good friends. Bacher had an old wooden plate press like the one in the photo below and Whistler came often to his lodgings to print proofs of his ongoing work.


For his part Bacher was an eager pupil and Whistler wanted to teach. Bacher was a good observer and just as interested in the technical aspects of etching as Whistler. After Whistler's death Bacher published With Whistler In Venice in 1909. I highly recommend anyone interested in etching or art in general read this book as it describes in great detail Whistler's method of etching as well as the life of young artists living abroad in the latter half of the 19th century.

Monday, June 21, 2010

Etching Of The Week


The above etching with drypoint is a beautiful work by Whistler called Tilbury that he did in 1887. On his later etchings he would cut the border off down to the plate mark except for the tab where his signature, usually a stylized butterfly, appeared. Tilbury is on the north bank of the Thames east of London with Gravesend opposite on the south bank. Whistler lived on or near the Thames for much of his time in London, though in different residences. He plied the river constantly for daily scenes of everyday activity. I love how he manages to convey so much with so few carefully chosen lines.

I'm currently reading his biography by Elizabeth and Joseph Pennell. Though almost a generation younger, both were intimates of his for many years. J. Pennell, himself an illustrator, became a great etcher in his own right; more on him in a future posting. These characters and many more were all part of the etching revival of the 19th century. The ripples of that revival are still felt today and the history and fruit of which remain constant streams of inspiration.

Saturday, May 29, 2010

Twice Bitten


I took some advice from the Wet Canvas Forum to re-ground and re-bite the plate. Here is the 2nd proof of the re-bitten plate. For the most part I did not re-needle the original lines and concentrated on those areas that had not bitten at all the first time around. As I suppose was inevitable, the original lines and the newly bitten lines did not match exactly though I tried to stop out and time the biting so they would be as close as possible. The newly bitten lines ended up a bit darker so on the second proof I wiped those areas more to remove more ink. That worked pretty well as you may (or may not) agree, and if I spend more time I can probably get the match even closer. Comments would be very welcome.

Sunday, May 23, 2010

Take Me Down To The River


As I’ve mentioned before, I live about a half mile from the Delaware River in west-central New Jersey. Several weeks ago I drove a few miles north to one of the few bridges across the river at Riegelsville, Pennsylvania. The bridge was built by Roebling & Sons of New Jersey in 1904, the same firm that built the Brooklyn Bridge. It’s a beautiful suspension bridge, one of a handful of continuous wire-rope suspension bridges in the country. For all that, it’s a small, country-sized bridge that replaced the original covered bridge built there in the 1830’s though it uses the original stone supports. I drive across this bridge every day as I go to and from work in Easton, Pa.

Anyway, it was one of the local sites I wanted to capture in an etching and I decided this was a good weekend to make the plate and pull a proof or two. I still have a lot to learn about drawing, etching and printmaking and I took a few more small steps forward through working on this project.

I would very much appreciate hearing them people's opinions about problems. In my opinion the image is too light. I don't think this was because of the biting but with the needling or, to go back even further, with the grounding. I used a standard liquid hard ground but since I had problems with a previous plate where the acid leeched through a bit I decided to put two coats on this time. That may still have worked out but I didn’t account for that extra thickness when I needled the plate and I did clear the lines properly. They looked OK up to a point, and my lack of experience told me they were OK, but in reality they still had some measure of the ground left on them. This resulted in some lines not coming out at all and others that were very light or incomplete.

I don’t necessarily think that proved to be a complete disaster, but there are some elements that I wish were not so spotty and the lines I needled for the water are pretty much nonexistent. Again, I would appreciate opinions on this. I was not going for an architectural copy of the bridge but an impressionistic interpretation having drawn it from nature. I do think I will add some dry point to give some appearance to the water.

On the other hand, this is my first real drawing from nature turned into an etched plate and a print. So whatever its faults, I’m excited and pleased.

Here are the facts: Bridge over the Delaware River at Riegelsville, Penna.; 3” x 4” copper plate etching from nature; Graphic Chemical’s bone black etching ink on their generic cotton house paper.

Sunday, May 16, 2010

Finis Origine Pendet


Bertha C. Jacques co-founded the Chicago Society of Etchers in 1910 and helped launch a revival of American fine art printmaking that included hundreds of female artists. Many printmaking programs and art societies sprang up as a result.

I like the photo above. The young woman is obviously determined to produce a print. Not only is she exerting herself physically but she has made the effort to establish at least a rudimentary studio space in the corner of her room. From the style of her hair and dress I'm guessing the photo dates from the 1920's or 30's. If the latter she is perhaps one of the many women and men taking advantage of the New Deal's WPA art programs, many of which were home-grown operations. The room and furnishings seem to confirm a humble situation in life as much as her clothing and lack of high style. In spite of these things, or perhaps because of them, she is pursuing something beyond the drudgery of day to day existence in order to speak in way available only to those who try.

Sunday, April 25, 2010

It's All Greek To Me


I was 28 when I went to college. Part of the course of study was 2 ½ years of koine Greek, the ancient common Greek that was the language of trade and commerce throughout the Mediterranean at the time of the birth of Christ. The memorization of words to establish a working vocabulary began immediately as did basic grammar: Auto, Autos, Auton. -ei, -eis, -ein. You get the idea; much fun ensued. At some point in my elementary school education I had been taught English grammar: noun, verb, adjective, etc. English is a fortunate language, not having declension tables to worry about. In any case, having been duly educated as a young man I promptly forgot most of what I had been taught about English grammar and now at college, 10 years out of high school, found that to deal with the grammar and thereby learn this ancient and quite dead language I would need to relearn English grammar.

I mention the above because I’ve discovered in my exploration of etching that I have a similar failing. The cure for this failing is the same as it was then: get back to basics. This translates into a need to learn how to draw. Of course, I had some notion of the need to draw at the time I was first contemplating printmaking at all. I’ve never considered myself an artist and certainly have not felt I’ve had any particular skill or natural ability at drawing, painting, or creating images in general. I took whatever art classes in school were required, I think it was one in high school, and focused on other things. That has always meant some kind of craftwork and is why I’m a cabinetmaker today.

So when I first considered getting involved with printmaking, and copper plate etching in particular, I thought about how my lack of either training or special ability to draw would affect what I would be able to do. I decided I could probably do some simple basic work but for the most part confine myself to more abstract images and especially soft ground work in which objects are pressed into the ground to create the image. But as part of my self-taught education as an etcher that has involved reading about the etchers and methods of the past, especially those etchers of the Etching Revival of the 19th and early 20th century, I’ve discovered in myself a real thirst to express myself as an etcher that will require more than stick figures or tracing.

I’m therefore teaching myself how to draw. I’ve picked up several standard works and have my dad’s old drafting leads and lead holders. I’ve made two short drives in the last couple weeks to practice recording local subjects. I live on the Delaware River and there are an unlimited number of interesting and beautiful subjects to choose from. So far I’ve confirmed that I don’t have any particularly great natural skill. But in this short time I’ve found that I’m not completely bereft of any ability. I’ve seen enough in my work to give me confidence that if I continue to learn and practice I will be able to at least satisfy my own desires to communicate through drawing and thus through etching. I’ll be making etchings as I go since I am still learning there as well. But it will be déjà vu all over again as I learn etching at the same time as I learn its prerequisite drawing, the same as I once learned to understand Greek grammar at the same time I learned its prerequisite English.

Now I have to go as a sudden urge for souvlaki has overtaken me.

Wednesday, April 14, 2010

A Nod To Melvil Dewey


I decided to copy my posts dealing with etching and printmaking from my letterpress blog to this new one. I did this partly to prime the pump and partly because blogs are useful archives of information. One of my hopes in maintaining a blog is that people might learn from my trials and tribulations as I have learned so much from others. Having the opportunity to go back in some cases through several years of blog posts I've researched has been invaluable. My attempt at accurately labeling each post will have to substitute for the more elaborate system of cataloging that might have pleased Mr. Dewey.

The Haunting

_________________________

Blood of bat and bone of cat,

Tongue of frog and tooth of rat,

Hog’s hair, claw of bear,

Three times three, now follow me…

Ghosts sometimes appear when least expected and at the most inopportune times. This can present problems for those of us who steadfastly deny their existence. But there are times, especially when practicing the ancient craft of printing, that we must at least partially confess the truth that there are more things in heaven and earth than are dreamt of in our philosophy.

I made my second etched plate last weekend, soft ground on a 3” x 4” copper plate. This was done the same as with the pine branch, laying some twine on the grounded plate and running it through the press. As it turned out, I made a mistake when doing this that I’ll detail below. I let it bite for about 25 minutes, a time that was based mostly on my experience with the pine branch and also on the line etching I did as my first experiment. I think I judged it better this time, though I’m happy with the pine branch as well.

To pull the proof I again used Graphic Chemical's Bone Black ink. And except for the final, and I think the best proof, their 150 lb. cotton rag house paper. For that proof I used my trusty unknown 20 lb. laid paper.

The first two proofs are shown above. Note that the one on the left was final wiped with newspaper and the one on the right was hand-wiped. After the first proof I noticed the ghost image circled above and thought it was something I had done during the wipe. But it appeared again on the second proof so I moved the plate slightly on the bed and got the result on the third proof seen above on the right: the same ghost in a different place. Those pesky spirits! I thought about this for a while and before organizing a séance I examined my felts carefully and found a matching depression in the catcher and cushion and then also in the woven pusher on the cylinder. This ghost hadn’t appeared in any other proofs I had pulled previously and it pretty much matches the size of the coil in the noose. And I did in fact run the plate through the press at right angles to the direction I pulled the proofs, which explains the orientation. So my conclusion is that I should have used more padding and less pressure when running the grounded plate through the press. Another lesson learned.

Here is the last proof I pulled which also received a final hand wipe. I’m rather pleased with it and call it Too Much Rope.

P.S. My thanks to Barbee Oliver Carleton for the poem from her children’s story The Wonderful Cat of Cobbie Bean that I first read as a boy in the book, The Arrow Book Of Ghost Stories, that I bought for 15 cents through the Scholastic Book Services at school in the 1960’s. Do they even still have books in school?

Well Grounded

Intaglio fun continues. Last weekend I experimented with soft ground. This is like hard ground except it has a greasy substance added such as tallow, Vaseline, or even grease. While it does dry, it stays soft and a bit sticky. Hard ground is usually removed with an etching needle and creates well defined and clean lines. If on the other hand you press something into the soft ground (paper, leaf, fabric, etc.) by running it through the press the soft ground will stick to it. When the article is removed it will have pressed through the soft ground to the plate in varying degrees depending on the texture of the article and that texture will expose parts of the plate in its likeness.

Soft ground was perhaps most common in the latter half of the 18th century and first half of the 19th. Traditionally it was used with paper and pencil. A piece of paper is laid over the soft-grounded plate and the drawing made directly onto the paper. The lines produced after etching are soft-edged, like charcoal or crayon. I was really intrigued by the idea of making a plate of an object such as a leaf or feather. I've seen work like this and it reminds me of fossils. It's somewhat haunting, somewhat surreal, impressionistic and moody. I like it.

I went outside and picked a few end branches off the Evergreen tree next to the house. I then had to experiment for quite a while to get the combination of pressure, wax and blotting paper, and blankets to work. I also had to trim the needles off to get a basically two-dimensional flat object that would lay flat and not overwhelm the image by being too dense. This required certain artistic decisions as to how much was too much and where exactly to remove and where to leave alone. Even so, the first several trials on brass key tags produced squashed pine needles, torn waxed paper, pine-juice scented blotting paper, and no need for air freshener. But finally I got it and ran a prepared 16 gauge 2" x 4" copper plate through the press. This was another piece of the old letterpress half-tone I was given. I had to fleck off a few errant pieces of pine needles but it looked pretty good.

I laid the plate in the mordant and a new guessing game ensued: how long to leave it in. This was even more difficult to judge than the line drawing I did on the hard grounded plate the week before. In that case at least all the lines were going to be etched to the same depth. Here they would vary because of the nature of the texture to be reproduced. In the end I left it there for about 20 minutes, checking twice during that time. For the most part I think I got it right. At least I was personally happy with it for my first time.


It was then on to pulling a few proofs and as you can see from the photos I tried it with two kinds of paper. The first type of paper was my old standby unknown brand, approx. 20 lb. laid paper. Since it's the only etching ink I have I used Graphic Chemical Bone Black. I did the final wipe with my hand. I apologize for the poor scans which show strange horizontal lines and make it look like the plate mark is smashed, etc. Once I get a decent digital camera I'll take nice photos instead.


The second proof was done on Graphic Chemical's 150 lb. cotton rag house paper, a few sheets of which I purchased to try out. Again, I used the Bone Black ink. I did the final wipe with old newspaper to get a cleaner background. That rotten scan again! There are no horizontal lines on the actual proof.

I'm not sure whether I like the hand wipe or the paper wipe better; each has its merits I suppose. I'm certain to do a lot of experimenting and of course I'm hoping my technique will improve which will have its own affect. I admit to being very pleased with the way the plate turned out, also somewhat astonished. At some point I will print an "edition" but for now I'm still learning and experimenting.

Etch-A-Sketch Redux

Hibernation continues as does my experimentation with intaglio printing. There are several intaglio processes, one of which is etching. I got some etching supplies last week and made my first etched plate today. The image is of an actual grave stone in a very secluded, wooded area in Rockland County, NY. I did grave stone rubbings a number of years ago when I was living in that area and found this grave in a graveyard in the middle of nowhere.

The plate is 1/16" x 3" x 4" cut from an old letterpress half-tone plate. The former front of that plate is now the back, of course. I'll be buying proper plates in the future but a friend of mine generously gave me some of these that his father had kept for years as scrap metal. They were long since useless for their intended purpose but work great for practice here. They do have some issues and I cleaned and flattened what is now the face but without going to Herculean efforts. For the moment they're more than satisfactory.

I brushed shellac on the back since I wanted to save money and not buy asphaltum or use the hard ground that is used on the front of the plate for this purpose and because I had plenty of shellac. I then brushed hard ground on the face and let it dry overnight.

I drew the image on paper with a No. 2 pencil and I laid this upside down on the plate, wrapped it around the back and taped it. I then put it through the Kelton press and removed the paper. Even though the ground was quite dark the graphite adhered and the image showed up very clear and sharp. Using a medium-sized needle I made, I needled the image on the plate.

I laid the plate face down at an angle in a glass baking dish. I was using ferric chloride instead of acid so while I didn't need a feather to brush away the bubbles I had to allow for the dissolving copper to drop off the plate and not hinder the etching process by filling the etched lines. I had read different things about how much time to allow for the etching. After 15 minutes I pulled the plate out and checked it but couldn't really tell what was happening. I placed it back in the dish and found the old enlarger lens that I often use for a loop. I pulled it out again and then could see that it was working. I put it back in and after a total of about a half hour took it out and rinsed it off in water. I was surprised how nice, at least to my eyes, it looked.

I couldn't wait to print a couple proofs with it and the results are below.

The first proof was on the unknown, approx. 20 lb. cotton laid paper I've been using up until now since I have a bunch of it I got for free. Note the dark vertical lines where the ferric chloride bit slightly through the hard ground. Next time I will have to pay more careful attention. The brushing left light and dark streaks, thicker and thinner, even though the coverage was complete.

For this next I wiped the plate cleaner and the vertical lines did not show up as much. Unfortunately I've found that scanning these prints instead of photographing them shows unsightly things that are not visible when looking at them directly. Not to mention that my scanner leaves strange horizontal lines in the image. But until I can get a decent camera this will have to do.

This last was with another more cleanly wiped plate but this time I used a heavier paper, 150 lb cotton rag. This is Graphic Chemical's "house paper" and aside from the fact that it is pretty inexpensive, seems to do a pretty nice job. Of course, I have little experience with which to really evaluate it against other papers. I didn't allow it to soak long enough and it did not press into the plate as well as it should have. Next time I'll remember...that and many other things I didn't take into account. Like the blobs of ink I missed on the edge of the plate on the last proof!

I'm teaching myself how to do all this and so far I'm rather pleased with the result.

Cleaned And Pressed

I finished the restoration of the etching press last weekend but couldn’t get my camera, the Sony dinosaur with 3 ½” floppy disks, to work until today. I’ve actually been doing some letterpress printing in between but more on that later. I’ve got a few Before And After photos below as well as some detail shots. The Before is on the left and the After on the right. The quality as usual is poor and in some cases doesn’t do the cleanup job justice. For example, the face of the large cylinder on the bottom was completely covered with paint, which it should not be for use. It is now completely clean. The same is true for the bed and the cylinder, in addition to which they were both covered with rust under the paint. They are now down to bare metal again. In fact, all of the bare metal and bronze bearings that you see were once covered with paint, dirt, and grease.

Speaking of grease, I found on this press what one often finds on old machinery: grease in the oil bearings. If any of you have old machinery that requires regular lubrication remember that the engineers who design machinery design bearings for a certain type of lubrication and that you can’t just decide on your own to change it without consequences. Bearings designed for oil have channels and reservoirs and oil holes and are sized to work with oil. Bearings designed for grease are specially designed to do so and have appropriate grease caps attached, etc. Some people put grease in bearings designed for oil thinking that the grease will last a long time and they won’t have to oil it. This is completely wrong, especially the idea that greased bearings require no attention. Except for the first day or so, the grease will not keep the bearing surfaces coated with lubricant and the bearings will wear. That was the case with this press. Remember that bearings designed for grease will have cups with screw caps or grease nipples like the universal joint bearings on your car. The cup type will have grease in them and periodically the caps must be screwed down a bit pushing more grease into the bearings. In the case of nipples, a grease gun is used to pump more grease into the bearing. Bearings design for oil will either have open holes or caps with hinged lids. More rarely, there are oil cups with glass reservoirs that can provide a constant drip of oil and there are a few other types of automatic oilers. But the average printer will not likely encounter these. The thing to remember is to identify whether or not the bearing should get grease or oil and then use the correct lubricant; don’t substitute one for the other. If someone else has done so clean out the bearing completely and then use the right lubricant.

NOTE: In the above After photo of the press, that brown thing hanging down that almost looks like an extension of the cylinder blanket is actually the window curtain that just happens to be lined up with and the same shade as the blanket.

Two of the bed’s guide/support rollers were broken and have been replaced with new, machined copies. Most of these rollers were rusted or otherwise frozen but everything was disassembled and cleaned and now turns smoothly. Etching presses use felt blankets, usually three long ones of different thicknesses on top of one another. They perform several functions including soaking up sizing from the wet paper, pressing the paper into the incised lines of the plate, and helping the cylinder push the bed and plate through the two rollers. This particular kind of press has a D-shaped (half) cylinder and the top blanket is attached directly to it as the photo above shows. The other two felt blankets are held in place at the rear of the bed by the bars and thumbscrews shown in another photo below and pass under the cylinder. I removed those two for the photos. The blanket on the cylinder gets a lot of wear from pushing the other felts through the rollers and is therefore usually woven felt in contrast to the pressed felt from which the others are made. I was fortunate to have a piece of used woven felt that was once the cylinder blanket of an old galley proof press. It was filthy and is still stained as the photo shows. But I cleaned it by hand with Woolite and it is now clean and perfectly serviceable, if dark in color.

The above photo shows the air piston that helps slow the bed down on its automatic return to the forward position. I described in a previous post how that aspect of the press works. I had to make a new leather cup washer as the old one was almost completely destroyed. It was surprisingly easy to do and is basically the same kind of mechanism found on old hand-operated water pumps. There is also a rubber bumper directly above where the piston goes into its tube. The rear of the tube has an adjustable cap with a hole so that the amount of air exhausting out and thus the speed of the bed’s return can be controlled. Pretty clever, eh?

In the above photo if you look carefully towards the bottom center you can see the counterweight that pulls the bed back to the forward position. It is suspended from a leather belt that runs over a pulley on the rear support roller shaft. You can see the brown belt in the photo of the air piston. I made the counterweight from a large slug/cylinder of brass I had laying around. It’s about 3” in diameter and 8” long and weights about 25 pounds. I wrapped it in leather with a large wooden dowel so I could easily attach a screw hook for a D-ring on the leather belt.

In one of my previous posts on this press I described the mechanism by which the felts are automatically held up and out of the way. I did hook things up so it would work but the felts I have, scraps I had laying around, are not quite long enough for this to work too well, though it did work. When I’m able to replace the felts I’ll hook it up properly.

A few other things I did: I made a new arm for the wheel. One had gone missing sometime in the distant pass and a wooden replacement had been fabricated for use while it was a display piece. Fortunately I had a length of 1-inch bar stock and the correct screw-cutting die on hand so after some grunting and groaning and plenty of smelly cutting fluid the job was done. Cutting a 1-inch diameter thread by hand is not that easy. I also made wooden runners for it. I also decided to place pieces of leather between the upper cylinder’s bearings and the iron pressure pads. I’ve seen this and read about it in a number of places and it seemed a good idea. Supposedly it provides a slight amount of give and avoids undue strain on the press. Maybe. But it certainly doesn’t hurt.

I’m very happy with the press and am making some more test prints. I can’t wait to incorporate what I can do with it with my letterpress work. And I’ve got so much printing to do now, both letterpress and intaglio, that I will be quite busy. No more restorations for a while!

Playing Tag

I’m about 95% finished with restoring the Kelton intaglio press. Later I’ll post more about the adventure of cleaning and adjusting it, which turned out to be a bigger job than I had at first suspected. This was mostly because after it left its useful life as a working press it lay somewhere getting rusty before the next owner applied black paint to every surface whether it was dirty, rusty, greasy, or was supposed to be painted or not. They then used it for a display piece which is also what the next owner intended for it when he got a lobby. Since this lobby never materialized, I now own the press. The net result is that many things were frozen and a lot of paint had to be removed which revealed a lot of rust that had to be removed. In the end it was fine but time consuming.

Anyway, I was so anxious to try something I had never done before, namely intaglio printing, and so much wanted to see whether or not the press actually worked that I threw caution to the winds. After final adjustments Sunday afternoon I had things just together enough to pull a proof. The problem was that I had virtually nothing that one needs to do this; nothing proper that is. I had no intaglio ink, copper plate, tarlatan rag, hot plate, or blotting paper. And I had only watched some Youtube videos and read about the process in a few vintage books I downloaded free online. But fools rush in where angels fear to tread.

I did have a few scraps of felt and some 100% cotton paper however. Also some rubber base letterpress ink and a couple 2” diameter brass key ID tags that had been stamped with numbers. Into one of these I made some scratches to try the drypoint technique. The end results can be seen below. Keep in mind that I didn’t wipe off the (wrong) ink properly and that punched numbers are not the same as etching or engraving; also that I wet the paper too much and didn’t blot it properly; and top all of that the fact that I was rushing a bit to get it done after a long day. They may be some of the worst intaglio prints ever but in the above context didn’t come out too badly for some quick test prints. I certainly got a thrill from the “accomplishment” and the knowledge that the press actually worked. If you look closely you can see my backwards initials in the little scratched box in the second photo. These lines are extremely fine and it surprised me how well they showed up.


I’ll detail in another post the last stages of the restoration and have some photos of the restored press as well as a few more things I learned about it.

Sign Of The Time

The time in this case is somewhere in the latter half of the 19th century. I found a little time capsule in the Kelton copper plate press today. But let me lay some groundwork.

Presses of this type, especially older ones, needed the lower roller adjusted to come into contact with the underside of the press bed. This was done quite simply using shims under the bronze bearing blocks. Any hard, stable material will do, thick and thin pieces being used as required. Wood and paper were sometimes used but these materials are dynamic, expanding or contracting with changes in the humidity, and therefore not the best. A possible exception would be oiled paper such as tympan that is both hard and stable. Steel, iron, copper, and brass were all more appropriate choices.

I had disassembled the Kelton as much as possible with the exception of the lower roller. I was able to remove the bearing blocks and shims but removing the roller itself would require taking the main frame completely apart. This wasn’t necessary as I could clean everything with the roller in place and supported by two pipes. I cleaned the bearing blocks today and the shims and it was here that I made my discovery.

The press has been moved at least four times in its life including from the factory to its first owner. Adjustment of the roller would have taken place after that first move and I think I know enough about the subsequent life of the press to state that no one has likely changed this initial adjustment. The roller is very heavy and holds the shims in place quite securely. By the time I got it the shims were pretty much glued in place as well with the gunk of the ages and the paint one of the previous owners had sloped on to make it shiny looking. Further examination bore out that they were certainly very old.

On both sides they consist of small steel plates, a few brass pieces of two different thicknesses, and on one side two pieces of oiled paper, possibly tympan. While the steel plates were for the most part unremarkable, one of them contained some evidence of the craft for which the press was intended. An example of this craft in action can be seen in the circa 1860 illustration below of the press room of the American Bank Note Company in New York City.


Copper and other plates used for intaglio printing have a bevel filed at the outer top edges, sometimes at a 45-degree angle but more often one less steep. The purpose of the bevel is to keep the otherwise sharp right angle of the edge from cutting into the paper under the great pressure exerted during printing. Anyone who has seen an intaglio print will likely remember that the edge of the plate is visible at the outside of the image. Even today plates do not come this way from the factory but the printer files the bevel himself. What I found on one of the steel shims was this hand-filed bevel.

The plate is 1/8” thick, a standard gauge for printing, and approximately 1 ¾” by 2” though not a perfect rectangle but a rather accurate parallelogram. As you can see from the photo, there are two holes drilled into it and it has numerous scratches in it. On one side the bevel is a fairly consistent 1/16” wide while on the reverse the edge has only been filed slightly, a distinct bevel but just enough to remove the sharp edge.


I can’t explain the reason why this small plate was prepared as if it was to be used for engraving or etching a print on it. Perhaps it was done for practice. Or perhaps when making a shim for the press the force of habit took over when removing the sharp burr at the edges. I do plan on reusing the original shims now that I’ve cleaned them and if further adjustments are needed simply adding to those. But I’m tempted to replace this one with a new piece of steel.

The stories this press could tell and in some ways is telling, eh?

Tuesday, April 13, 2010

Look Out, Here Comes The Spider Man!

This is actually a re-post from my Front Room Press blog but it does start this new blog off fairly well. I'll attempt to avoid future regurgitations.

If Peter Parker had wanted to be a print maker of a more ancient variety, he may very well have chosen intaglio as his medium. Had he done so he would have needed a copper plate press, sometimes called a spider-press because of its large spoked handwheel. I don’t spin webs of any size or catch thieves just like flies but I am in the process of restoring a vintage copper plate intaglio press. Eat your heart out, Spidey.

This press was built by the M. M. Kelton Company of Brooklyn, NY sometime from the 1850’s through the early 20th century. I haven’t been able to pin it down closer than that and have found little direct information on these presses. However, by doing a lot of internet research, piecing together tidbits of information including that gleaned form vintage photos and etchings, and disassembly and studying the press as part of its restoration, I’ve learned quite a bit. For one thing, this style of cast iron mass-produced press was used extensively by bank note companies as well as the U.S. Bureau of Engraving and Printing throughout the latter half of the 19th century. One of the largest users in my own area was the American Bank Note Company which had a printing house in Brooklyn, NY in addition to it’s headquarters in Manhattan. Brooklyn is of course where my press was made. Below is a photo of the ABNC’s now closed Brooklyn plant as it looks today.


Another photo shows these presses in operation and there are dozens, maybe hundreds of them churning out paper money, certificates, stamps, and all manner of financial documents. These presses were not designed for artists but for production. The top cylinder was in fact only a half-cylinder, its cross section appearing as a D-shape. The bed had a weight attached to the back that in conjunction with a pulley kept the bed in the forward position. When turning the handwheel an adjustable cam on the right side of the cylinder engaged with an adjustable mating cam on the bed which started the bed through the two (upper and lower) rollers automatically. Intaglio presses use three felt blankets laid over the paper and plate in order to cushion the pressure and press the paper into the incised plate to pick up the ink. On this press, the top blanket is attached to the top cylinder and a bar at the rear of the bed holds the other two blankets that extend along the bed under the upper cylinder.


Additionally, there is an iron frame above the press with a cross bar on which is a pulley. The blankets attached at the rear of the bed are held together at the front end where a rope is attached that goes over this pulley and on the end of which is a weight. When the press is at rest the bed is in its forward (start) position and the front end of the blankets are held up in the air out if the way so the plate and paper can be laid on the bed. Then the handwheel is turned, the bed is engaged and goes between the rollers making the print at which point it is automatically released merely by continuing to turn the handwheel. The bed automatically returns to its forward position and the blankets are automatically drawn up out of the way so the proof can be removed. Anyone who has operated an intaglio press will recognize the time saved with this arrangement. While not necessary for artist’s proofs, it’s a definite advantage for meeting production deadlines.


The press is not large but it is heavy. This is partly because the upper cylinder is solid, and even though the lower cylinder is a hollow casting it is very large and has thick walls as you would expect on an intaglio press because of the pressure exerted during printing. Modern presses have rollers about the same size top and bottom but it was common in the 19th century for the bottom roller to be much larger than the top as is the case here. Altogether the press weighs between 300 and 400 pounds, though that’s just an estimate. In practical terms it will print a plate up to 8” x 10”. The presses most recent use was as a display item in a print shop in Long Island City, i.e. Queens. It had been coated in black paint right over any dirt and rust so it would be nice and shiny. It needs to be completly cleaned and adjusted, the paint taken off where it shouldn't be, and some minor repairs made but otherwise nothing major. I suspect it came from the ABNC in Brooklyn when they closed that plant which is not too far away from its display post.


I have several letterpress printing projects that are a priority at the moment but I’ve begun the restoration process on this press and hope to be able to experiment within a month or so. I’ve never done intaglio before so it will be interesting. Besides limited edition proofs, I want to use it to produce artwork for my letterpress journal and also for artistamps that I can perforate on my Rosback perforator. I’ve seen some examples of work that is a combination of intaglio and letterpress so there are a lot of options, even if I don’t have radioactive blood.