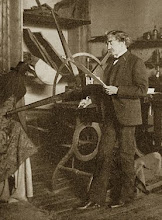
This blog is a record of my adventures as a copper plate etcher and printmaker. I'm a self-taught amateur learning from the ground up.
______________________________________________
"I will again define etching as an impression set down on a copper plate from nature or life -- not a built up, elaborated composition."
Joseph Pennell


Showing posts with label Printed Matter. Show all posts

Saturday, May 29, 2010

Twice Bitten


I took some advice from the Wet Canvas Forum to re-ground and re-bite the plate. Here is the 2nd proof of the re-bitten plate. For the most part I did not re-needle the original lines and concentrated on those areas that had not bitten at all the first time around. As I suppose was inevitable, the original lines and the newly bitten lines did not match exactly though I tried to stop out and time the biting so they would be as close as possible. The newly bitten lines ended up a bit darker so on the second proof I wiped those areas more to remove more ink. That worked pretty well as you may (or may not) agree, and if I spend more time I can probably get the match even closer. Comments would be very welcome.

Sunday, May 23, 2010

Take Me Down To The River


As I’ve mentioned before, I live about a half mile from the Delaware River in west-central New Jersey. Several weeks ago I drove a few miles north to one of the few bridges across the river at Riegelsville, Pennsylvania. The bridge was built by Roebling & Sons of New Jersey in 1904, the same firm that built the Brooklyn Bridge. It’s a beautiful suspension bridge, one of a handful of continuous wire-rope suspension bridges in the country. For all that, it’s a small, country-sized bridge that replaced the original covered bridge built there in the 1830’s though it uses the original stone supports. I drive across this bridge every day as I go to and from work in Easton, Pa.

Anyway, it was one of the local sites I wanted to capture in an etching and I decided this was a good weekend to make the plate and pull a proof or two. I still have a lot to learn about drawing, etching and printmaking and I took a few more small steps forward through working on this project.

I would very much appreciate hearing them people's opinions about problems. In my opinion the image is too light. I don't think this was because of the biting but with the needling or, to go back even further, with the grounding. I used a standard liquid hard ground but since I had problems with a previous plate where the acid leeched through a bit I decided to put two coats on this time. That may still have worked out but I didn’t account for that extra thickness when I needled the plate and I did clear the lines properly. They looked OK up to a point, and my lack of experience told me they were OK, but in reality they still had some measure of the ground left on them. This resulted in some lines not coming out at all and others that were very light or incomplete.

I don’t necessarily think that proved to be a complete disaster, but there are some elements that I wish were not so spotty and the lines I needled for the water are pretty much nonexistent. Again, I would appreciate opinions on this. I was not going for an architectural copy of the bridge but an impressionistic interpretation having drawn it from nature. I do think I will add some dry point to give some appearance to the water.

On the other hand, this is my first real drawing from nature turned into an etched plate and a print. So whatever its faults, I’m excited and pleased.

Here are the facts: Bridge over the Delaware River at Riegelsville, Penna.; 3” x 4” copper plate etching from nature; Graphic Chemical’s bone black etching ink on their generic cotton house paper.

Wednesday, April 14, 2010

The Haunting

_________________________

Blood of bat and bone of cat,

Tongue of frog and tooth of rat,

Hog’s hair, claw of bear,

Three times three, now follow me…

Ghosts sometimes appear when least expected and at the most inopportune times. This can present problems for those of us who steadfastly deny their existence. But there are times, especially when practicing the ancient craft of printing, that we must at least partially confess the truth that there are more things in heaven and earth than are dreamt of in our philosophy.

I made my second etched plate last weekend, soft ground on a 3” x 4” copper plate. This was done the same as with the pine branch, laying some twine on the grounded plate and running it through the press. As it turned out, I made a mistake when doing this that I’ll detail below. I let it bite for about 25 minutes, a time that was based mostly on my experience with the pine branch and also on the line etching I did as my first experiment. I think I judged it better this time, though I’m happy with the pine branch as well.

To pull the proof I again used Graphic Chemical's Bone Black ink. And except for the final, and I think the best proof, their 150 lb. cotton rag house paper. For that proof I used my trusty unknown 20 lb. laid paper.

The first two proofs are shown above. Note that the one on the left was final wiped with newspaper and the one on the right was hand-wiped. After the first proof I noticed the ghost image circled above and thought it was something I had done during the wipe. But it appeared again on the second proof so I moved the plate slightly on the bed and got the result on the third proof seen above on the right: the same ghost in a different place. Those pesky spirits! I thought about this for a while and before organizing a séance I examined my felts carefully and found a matching depression in the catcher and cushion and then also in the woven pusher on the cylinder. This ghost hadn’t appeared in any other proofs I had pulled previously and it pretty much matches the size of the coil in the noose. And I did in fact run the plate through the press at right angles to the direction I pulled the proofs, which explains the orientation. So my conclusion is that I should have used more padding and less pressure when running the grounded plate through the press. Another lesson learned.

Here is the last proof I pulled which also received a final hand wipe. I’m rather pleased with it and call it Too Much Rope.

P.S. My thanks to Barbee Oliver Carleton for the poem from her children’s story The Wonderful Cat of Cobbie Bean that I first read as a boy in the book, The Arrow Book Of Ghost Stories, that I bought for 15 cents through the Scholastic Book Services at school in the 1960’s. Do they even still have books in school?

Well Grounded

Intaglio fun continues. Last weekend I experimented with soft ground. This is like hard ground except it has a greasy substance added such as tallow, Vaseline, or even grease. While it does dry, it stays soft and a bit sticky. Hard ground is usually removed with an etching needle and creates well defined and clean lines. If on the other hand you press something into the soft ground (paper, leaf, fabric, etc.) by running it through the press the soft ground will stick to it. When the article is removed it will have pressed through the soft ground to the plate in varying degrees depending on the texture of the article and that texture will expose parts of the plate in its likeness.

Soft ground was perhaps most common in the latter half of the 18th century and first half of the 19th. Traditionally it was used with paper and pencil. A piece of paper is laid over the soft-grounded plate and the drawing made directly onto the paper. The lines produced after etching are soft-edged, like charcoal or crayon. I was really intrigued by the idea of making a plate of an object such as a leaf or feather. I've seen work like this and it reminds me of fossils. It's somewhat haunting, somewhat surreal, impressionistic and moody. I like it.

I went outside and picked a few end branches off the Evergreen tree next to the house. I then had to experiment for quite a while to get the combination of pressure, wax and blotting paper, and blankets to work. I also had to trim the needles off to get a basically two-dimensional flat object that would lay flat and not overwhelm the image by being too dense. This required certain artistic decisions as to how much was too much and where exactly to remove and where to leave alone. Even so, the first several trials on brass key tags produced squashed pine needles, torn waxed paper, pine-juice scented blotting paper, and no need for air freshener. But finally I got it and ran a prepared 16 gauge 2" x 4" copper plate through the press. This was another piece of the old letterpress half-tone I was given. I had to fleck off a few errant pieces of pine needles but it looked pretty good.

I laid the plate in the mordant and a new guessing game ensued: how long to leave it in. This was even more difficult to judge than the line drawing I did on the hard grounded plate the week before. In that case at least all the lines were going to be etched to the same depth. Here they would vary because of the nature of the texture to be reproduced. In the end I left it there for about 20 minutes, checking twice during that time. For the most part I think I got it right. At least I was personally happy with it for my first time.


It was then on to pulling a few proofs and as you can see from the photos I tried it with two kinds of paper. The first type of paper was my old standby unknown brand, approx. 20 lb. laid paper. Since it's the only etching ink I have I used Graphic Chemical Bone Black. I did the final wipe with my hand. I apologize for the poor scans which show strange horizontal lines and make it look like the plate mark is smashed, etc. Once I get a decent digital camera I'll take nice photos instead.


The second proof was done on Graphic Chemical's 150 lb. cotton rag house paper, a few sheets of which I purchased to try out. Again, I used the Bone Black ink. I did the final wipe with old newspaper to get a cleaner background. That rotten scan again! There are no horizontal lines on the actual proof.

I'm not sure whether I like the hand wipe or the paper wipe better; each has its merits I suppose. I'm certain to do a lot of experimenting and of course I'm hoping my technique will improve which will have its own affect. I admit to being very pleased with the way the plate turned out, also somewhat astonished. At some point I will print an "edition" but for now I'm still learning and experimenting.

Etch-A-Sketch Redux

Hibernation continues as does my experimentation with intaglio printing. There are several intaglio processes, one of which is etching. I got some etching supplies last week and made my first etched plate today. The image is of an actual grave stone in a very secluded, wooded area in Rockland County, NY. I did grave stone rubbings a number of years ago when I was living in that area and found this grave in a graveyard in the middle of nowhere.

The plate is 1/16" x 3" x 4" cut from an old letterpress half-tone plate. The former front of that plate is now the back, of course. I'll be buying proper plates in the future but a friend of mine generously gave me some of these that his father had kept for years as scrap metal. They were long since useless for their intended purpose but work great for practice here. They do have some issues and I cleaned and flattened what is now the face but without going to Herculean efforts. For the moment they're more than satisfactory.

I brushed shellac on the back since I wanted to save money and not buy asphaltum or use the hard ground that is used on the front of the plate for this purpose and because I had plenty of shellac. I then brushed hard ground on the face and let it dry overnight.

I drew the image on paper with a No. 2 pencil and I laid this upside down on the plate, wrapped it around the back and taped it. I then put it through the Kelton press and removed the paper. Even though the ground was quite dark the graphite adhered and the image showed up very clear and sharp. Using a medium-sized needle I made, I needled the image on the plate.

I laid the plate face down at an angle in a glass baking dish. I was using ferric chloride instead of acid so while I didn't need a feather to brush away the bubbles I had to allow for the dissolving copper to drop off the plate and not hinder the etching process by filling the etched lines. I had read different things about how much time to allow for the etching. After 15 minutes I pulled the plate out and checked it but couldn't really tell what was happening. I placed it back in the dish and found the old enlarger lens that I often use for a loop. I pulled it out again and then could see that it was working. I put it back in and after a total of about a half hour took it out and rinsed it off in water. I was surprised how nice, at least to my eyes, it looked.

I couldn't wait to print a couple proofs with it and the results are below.

The first proof was on the unknown, approx. 20 lb. cotton laid paper I've been using up until now since I have a bunch of it I got for free. Note the dark vertical lines where the ferric chloride bit slightly through the hard ground. Next time I will have to pay more careful attention. The brushing left light and dark streaks, thicker and thinner, even though the coverage was complete.

For this next I wiped the plate cleaner and the vertical lines did not show up as much. Unfortunately I've found that scanning these prints instead of photographing them shows unsightly things that are not visible when looking at them directly. Not to mention that my scanner leaves strange horizontal lines in the image. But until I can get a decent camera this will have to do.

This last was with another more cleanly wiped plate but this time I used a heavier paper, 150 lb cotton rag. This is Graphic Chemical's "house paper" and aside from the fact that it is pretty inexpensive, seems to do a pretty nice job. Of course, I have little experience with which to really evaluate it against other papers. I didn't allow it to soak long enough and it did not press into the plate as well as it should have. Next time I'll remember...that and many other things I didn't take into account. Like the blobs of ink I missed on the edge of the plate on the last proof!

I'm teaching myself how to do all this and so far I'm rather pleased with the result.

Playing Tag

I’m about 95% finished with restoring the Kelton intaglio press. Later I’ll post more about the adventure of cleaning and adjusting it, which turned out to be a bigger job than I had at first suspected. This was mostly because after it left its useful life as a working press it lay somewhere getting rusty before the next owner applied black paint to every surface whether it was dirty, rusty, greasy, or was supposed to be painted or not. They then used it for a display piece which is also what the next owner intended for it when he got a lobby. Since this lobby never materialized, I now own the press. The net result is that many things were frozen and a lot of paint had to be removed which revealed a lot of rust that had to be removed. In the end it was fine but time consuming.

Anyway, I was so anxious to try something I had never done before, namely intaglio printing, and so much wanted to see whether or not the press actually worked that I threw caution to the winds. After final adjustments Sunday afternoon I had things just together enough to pull a proof. The problem was that I had virtually nothing that one needs to do this; nothing proper that is. I had no intaglio ink, copper plate, tarlatan rag, hot plate, or blotting paper. And I had only watched some Youtube videos and read about the process in a few vintage books I downloaded free online. But fools rush in where angels fear to tread.

I did have a few scraps of felt and some 100% cotton paper however. Also some rubber base letterpress ink and a couple 2” diameter brass key ID tags that had been stamped with numbers. Into one of these I made some scratches to try the drypoint technique. The end results can be seen below. Keep in mind that I didn’t wipe off the (wrong) ink properly and that punched numbers are not the same as etching or engraving; also that I wet the paper too much and didn’t blot it properly; and top all of that the fact that I was rushing a bit to get it done after a long day. They may be some of the worst intaglio prints ever but in the above context didn’t come out too badly for some quick test prints. I certainly got a thrill from the “accomplishment” and the knowledge that the press actually worked. If you look closely you can see my backwards initials in the little scratched box in the second photo. These lines are extremely fine and it surprised me how well they showed up.


I’ll detail in another post the last stages of the restoration and have some photos of the restored press as well as a few more things I learned about it.